- Introduction
- What is Horizontal Offset?
- Benefits of Horizontal Offset
- How to Use Horizontal Offset
- 1. Locate the Horizontal Position Control
- 2. Adjust the Control to Move the Waveform
- 3. Fine-Tune as Needed
- 4. Utilize Additional Features (if Available)
- Horizontal Offset vs. Time Base Adjustment
- Practical Applications of Horizontal Offset
- Pulse Analysis
- Serial Data Inspection
- Glitch Detection
- Timing Comparisons Between Channels
- Measuring Signal Propagation Delays
- Power Quality and Transient Events
- Conclusion
- Whenever You’re Ready, Here Are 5 Ways We Can Help You
Have you ever missed a crucial detail on a waveform because it wasn’t positioned right on the screen?
In signal testing and diagnostics, catching these details can be critical, especially when you’re examining transient events or subtle anomalies.
That’s where horizontal offset on an oscilloscope comes in handy. This feature lets you fine-tune the waveform's position along the time axis, helping you zero in on exactly the portion of the signal you need, without changing the overall time scale.
In this article, we’ll explore how horizontal offset works, practical uses, and tips for maximizing this tool’s potential in your signal analysis.
| Key Takeaway |
|---|
| Horizontal offset on an oscilloscope helps you position specific waveform sections for detailed analysis without altering the time scale, making it invaluable for precise measurements. Using this function effectively can improve signal insight and accuracy in testing. |
What is Horizontal Offset?
Horizontal offset, also known as horizontal position, allows you to adjust the position of the waveform along the time axis.
This doesn’t alter the time base (the time scale) but instead allows you to focus on certain portions of the signal, like a transient spike or pulse edge, for more in-depth analysis.
Benefits of Horizontal Offset
Using horizontal offset offers distinct advantages:
- Detailed analysis: Centering on specific waveform sections helps identify glitches, transient events, and fine details.
- Signal comparison: Aligning multiple channels on the display allows for precise timing comparisons between signals.
- Enhanced triggering: By positioning parts of the waveform more accurately, you can set up triggers more effectively, capturing signals with greater clarity.
How to Use Horizontal Offset
Using the horizontal offset function on an oscilloscope involves a few straightforward but important steps.
Mastering this control can improve your waveform analysis by helping you isolate specific events or details in a signal.
Here’s a step-by-step guide to using horizontal offset effectively.
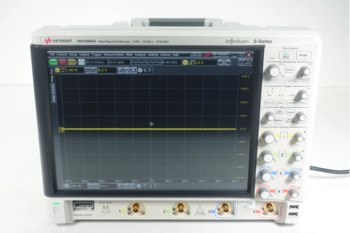
1. Locate the Horizontal Position Control
Most oscilloscopes have a dedicated Horizontal Position Control—often labeled as "Horizontal Position," "Position," or "Delay."
This control is typically part of the oscilloscope’s horizontal (time) control panel, which manages how the waveform is displayed along the time axis.
On many digital oscilloscopes, this control is a rotary knob, while on others, it may appear as a button or virtual control on a touchscreen.
- Tip: Refer to your oscilloscope’s user manual if you're unsure where to find this control, as locations can vary by model.
2. Adjust the Control to Move the Waveform
Once you locate the horizontal position control, rotate or press it to shift the waveform left or right along the time axis.
Rotating the control clockwise usually shifts the waveform to the right, showing events that occur later in the signal, while rotating it counterclockwise moves it to the left, revealing earlier events.
This adjustment effectively repositions the start point of the waveform on your display without changing the time scale. The waveform itself remains unaltered; only the portion visible on the screen shifts based on your input.
- Tip: Use this feature in combination with the oscilloscope’s triggering controls. By centering the waveform around the trigger point, you can focus on the area of interest (e.g., a pulse or glitch) and ensure stable signal capture.
3. Fine-Tune as Needed
Once you've roughly positioned the waveform, you may need to make small, precise adjustments to achieve the exact view you need for analysis.
This fine-tuning is essential when working with waveforms that contain subtle details, such as the edges of pulses, brief transients, or glitches.
By carefully rotating the horizontal position control, you can ensure that the desired part of the waveform is fully centered on the screen for optimal viewing.
- Tip: Some oscilloscopes have a “fine” adjustment mode for even more precise control over waveform positioning. Check if this feature is available on your model, as it can help with small adjustments that prevent overshooting or undershooting the desired position.
4. Utilize Additional Features (if Available)
Some oscilloscopes offer enhanced horizontal controls that provide more advanced positioning options:
- Zoom mode: When combined with horizontal offset, zoom mode allows you to magnify specific parts of the waveform, making it easier to view finer details.
- Memory and save settings: On more advanced oscilloscopes, you can save horizontal offset settings for repeat measurements, allowing for consistent display positioning in similar tests.
- Cursor measurements: Many oscilloscopes include cursor functions that let you measure time intervals and voltage levels at precise points on the waveform. These cursors are particularly useful when examining a waveform positioned with the horizontal offset, as they provide additional context for the displayed segment.
Horizontal Offset vs. Time Base Adjustment
Many oscilloscopes offer both horizontal offset and time-base adjustment, but they serve different purposes. Here’s how they compare:
| Feature | Horizontal Offset | Time Base Adjustment |
| Function | Shifts the waveform left or right along the time axis | Changes the time scale (seconds per division) |
| Effect | Centers specific waveform sections for detailed analysis | Zooms in or out on the waveform |
| Use Case | Useful for focusing on transient events or glitches | Helps view longer waveforms or fine details |
By combining both horizontal offset and time-base adjustment, you can precisely position and scale waveforms, making it easier to analyze specific events and observe broader signal trends.
Practical Applications of Horizontal Offset
Horizontal offset is an invaluable tool in various testing scenarios where accurate timing and waveform positioning are critical.
By allowing you to shift a waveform along the time axis, this feature makes it easier to inspect specific parts of a signal without altering its scale.
Here are some practical applications that benefit from horizontal offset adjustments.
Pulse Analysis
In pulse analysis, focusing on specific parts of a pulse, like the rising or falling edges, is crucial for assessing signal integrity and measuring key parameters such as rise time, fall time, and pulse width.
Using horizontal offset, you can position the pulse edge at the center of the display, which helps eliminate any unnecessary parts of the signal and allows for detailed measurement.
- Example: When examining digital signals, precise rise and fall times indicate proper functioning, while delays or distortions in these times may suggest issues like signal degradation or power supply fluctuations.
Serial Data Inspection
Horizontal offset becomes especially valuable when working with serial data communication protocols, such as I2C, SPI, or UART.
In these cases, a single data packet or frame may contain multiple bits, and isolating individual bits or byte sequences is critical for understanding communication patterns or troubleshooting errors.
By adjusting the horizontal offset, you can quickly scroll to the exact part of the data stream you need to inspect.
- Example: When analyzing a UART signal, shifting the waveform can help you observe a specific start or stop bit, making it easier to decode messages and verify data accuracy.
Glitch Detection
Glitches—unexpected, brief anomalies in a signal—can cause considerable issues in electronics, especially in high-speed digital circuits.
Since glitches usually appear sporadically and may not last long, capturing and analyzing them can be challenging.
Horizontal offset allows you to reposition the waveform and center the glitch on the display, making it easier to capture the anomaly and inspect it in detail.
- Example: In microcontroller applications, a glitch in the clock signal can lead to data corruption or synchronization errors. By positioning the glitch centrally on the display, you can analyze its timing and magnitude to determine the root cause.
Timing Comparisons Between Channels
In multi-channel oscilloscopes, horizontal offset is also useful for comparing signals across different channels.
When signals need to be aligned to evaluate timing differences—such as delays or phase shifts—horizontal offset allows you to bring these waveforms into alignment, making timing comparisons straightforward and accurate.
- Example: When analyzing the timing relationship between a clock and data line in synchronous systems, positioning both signals side-by-side allows you to verify if data changes happen precisely when expected relative to the clock, which is critical in data transmission quality.
Measuring Signal Propagation Delays
In some applications, particularly when testing propagation delays between input and output signals, horizontal offset can position the waveform segments you’re interested in on the display.
By centering the initial pulse and its response on the screen, you can accurately measure the delay, which can help identify if signal paths are performing within expected parameters.
- Example: In RF communication systems, propagation delays can indicate issues with signal paths or components. By carefully positioning each relevant segment of the waveform, you can detect slight delays that impact performance.
Power Quality and Transient Events
For power quality testing, horizontal offset can help in capturing transient events, such as voltage sags, swells, or spikes, that often last for only a brief duration.
Centering these events on the display makes it easier to measure their impact and analyze their cause, essential for troubleshooting in power-sensitive applications.
- Example: When monitoring AC power supply stability, transient voltage spikes can damage sensitive components. Using horizontal offset, you can center these events for accurate timing and magnitude measurements, helping you determine if further action is required.
Conclusion
Mastering the horizontal offset function on your oscilloscope can significantly enhance your signal analysis.
From focusing on pulse edges and isolating serial data bits to detecting glitches and measuring propagation delays, horizontal offset provides the precise control needed to center important signal details on your display.
If you’re looking to equip your lab with premium testing tools at a great value, check out the Keysight Used Equipment Store. With a selection of high-quality, pre-owned oscilloscopes, spectrum analyzers, function generators, and multimeters, you can access trusted Keysight performance while staying within budget.
Whenever You’re Ready, Here Are 5 Ways We Can Help You
- Browse our Premium Used Oscilloscopes.
- Call tech support US: +1 800 829-4444
Press #, then 2. Hours: 7 am – 5 pm MT, Mon– Fri - Talk to our sales support team by clicking the icon (bottom right corner) on every offer page
- Create an account to get price alerts and access to exclusive waitlists.
- Talk to your account manager about your specific needs.
